Raspberry Pis have started making there way into homes all across the world. When I got mine, the first thing I wanted to do was set it up as a router to replace my aging piece of D-link garbage.
This guide is somewhat geared towards those new to Linux so experienced users can feel free to skip around a bit and modify some of my commands.
The first step is to download and install Raspbian onto your SD card. You could just as easily use Debian, but Raspbian is preferred because it's optimized for the Pi. I'm using the Darkbasic minimal image because there's really no use for a GUI on a router and it would just hog resources but you can decide what flavor you like best.
I won't tell you how to install Raspbian because there's plenty of guides on the Raspbian site that explain it way better than I ever could.
From my experience, the Raspbian images you can download contain older versions of the Raspberry Pi firmware which is a problem because the kernel is not compiled with iptables support. Hexxeh to the rescue! The easiest way to install the new firmware is to use Hexxeh's rpi-updater which is available here with instructions as to how to install it. Remember to install ca-certificates before you wget the updater.
If I remember correctly, the script has one more dependency, but it will tell you what it is and it's available in the repositories and you can just apt-get it.
After your firmware has been updated, reboot the pi to activate it.
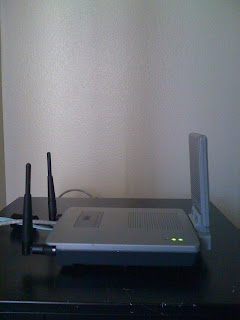
Here's where the fun begins, but first a bit of logic regarding my setup. As is shown in my video, the on-board NIC of the pi (eth0) is connected to the internet via my cable modem. My USB-NIC (eth1) is connected to my internal network, specifically in my case a wireless access point, but you could just as easily connect a switch if you need more wired ports.
As you can see in the video, I am using an apple branded USB-NIC because it's what I had lying around, but this is not a necessity. Debian has good support for lots of USB-NICs and in most cases they'll be recognized when you plug them in without any additional configuration.
The first step is to edit /etc/network/interfaces.
We want the internet facing NIC to get an address from our ISP via DHCP and our internal NIC to have a static address. I am using 192.168.50.0/24 as my internal subnet but you can use any subnet you like as long as it is RFC 1918 compliant. Keep in mind a /24 (255 addresses) is most always big enough for a home network.
Here is what my /etc/network/interfaces file looks like. If you decide to change the internal subnet, you'll need to edit my addresses to suit your setup.
Next we need to install the DHCP server package on our Pi so we can allocate addresses to clients.
Now let's edit the DHCP server configuration file.
The configuration files provides a lot of examples that are all commented out. Feel free to read them if you care to. Since this should be the only DHCP server on our network, let's make it authoritative. Uncomment out the authoratative line near the top of the file.
Next, lets add a new subnet. Scroll down to the bottom of the file and add something like this:
Again, this is assuming a 192.168.50.0/24 subnet. You'll need to change it if you've chosen a different subnet.
You'll also notice I'm using the Google public DNS servers, 8.8.8.8 and 8.8.4.4. If you prefer to use the DNS servers provided by your ISP, you'll need to change this line to reflect their addresses.
Save the file and restart the DHCP service.
If you receive an error about no interfaces being in the proper address space double check your configurations and make sure your static address on eth1 is in the same subnet as your DHCP subnet. if you need to make any changes you'll need to restart the relevant services.
At this point you should be able to plug a device into the USB NIC (eth1) interface of your pi and receive an IP address via dhcp. However, you won't be able to get any further on the network than your Pi itself. To solve this, we need to enable IP forwarding.
Guides I read said I needed to do one or the other of the following things, however, I had to do both. First run the following command:
Next edit /etc/sysctl.conf and uncomment out the line that says net.ipv4.ip_forward = 1.
Save the file.
The final step is to insert an iptables rule to allow NAT.
Time for final testing. Plug a computer into the eth1 interface on your pi and plug the onboard NIC into your modem.
After the negotiation phase, your computer will pull an address and you should be able to access the internet! if it doesn't work, ssh to the Pi by using the address you gave eth1 (192.168.50.1 in my case) and ensure that eth0 has a public address by running ifconfig.
Check your IP address by running ifconfig again and see if you can reach the internet. You may need to reboot your modem, however do not reboot your Pi for the reasons that are to follow.
If it's still not working, stop here and go back and make sure you've not missed any steps.
You should not reboot your Pi at this point because the iptables rules for nat we inserted earlier are not persistent and if you reboot they will be overridden by the default configuration (nothing). We can fix this by saving the rules and creating a little script to restore them as the network interfaces come up during boot.
First, save your iptables rules to a file.
You don't have to save them to /etc/iptables.up.rules, that's just where I save mine.
Next create a script in /etc/network/if-pre-up.d/ with the following contents:
Change ownership and permissions of the script so it will run at boot.
Voila. You can now reboot and your iptables rules will stay persistent.
For some additional security, lets add some more iptables rules:
This blocks access from RFC 1918 subnets on your internet (eth0) interface as well as ICMP (ping) packets and ssh connections.
Remember to save whenever you make changes!
This guide is somewhat geared towards those new to Linux so experienced users can feel free to skip around a bit and modify some of my commands.
The first step is to download and install Raspbian onto your SD card. You could just as easily use Debian, but Raspbian is preferred because it's optimized for the Pi. I'm using the Darkbasic minimal image because there's really no use for a GUI on a router and it would just hog resources but you can decide what flavor you like best.
I won't tell you how to install Raspbian because there's plenty of guides on the Raspbian site that explain it way better than I ever could.
From my experience, the Raspbian images you can download contain older versions of the Raspberry Pi firmware which is a problem because the kernel is not compiled with iptables support. Hexxeh to the rescue! The easiest way to install the new firmware is to use Hexxeh's rpi-updater which is available here with instructions as to how to install it. Remember to install ca-certificates before you wget the updater.
sudo apt-get update && sudo apt-get install ca-certificatesIf I remember correctly, the script has one more dependency, but it will tell you what it is and it's available in the repositories and you can just apt-get it.
After your firmware has been updated, reboot the pi to activate it.
Here's where the fun begins, but first a bit of logic regarding my setup. As is shown in my video, the on-board NIC of the pi (eth0) is connected to the internet via my cable modem. My USB-NIC (eth1) is connected to my internal network, specifically in my case a wireless access point, but you could just as easily connect a switch if you need more wired ports.
As you can see in the video, I am using an apple branded USB-NIC because it's what I had lying around, but this is not a necessity. Debian has good support for lots of USB-NICs and in most cases they'll be recognized when you plug them in without any additional configuration.
The first step is to edit /etc/network/interfaces.
sudo nano /etc/network/interfacesWe want the internet facing NIC to get an address from our ISP via DHCP and our internal NIC to have a static address. I am using 192.168.50.0/24 as my internal subnet but you can use any subnet you like as long as it is RFC 1918 compliant. Keep in mind a /24 (255 addresses) is most always big enough for a home network.
Here is what my /etc/network/interfaces file looks like. If you decide to change the internal subnet, you'll need to edit my addresses to suit your setup.
# interfaces(5) file used by ifup(8) and ifdown(8)

auto lo
iface lo inet loopback

#Onboard NIC connecting to the Internet
auto eth0
iface eth0 inet dhcp

#USB NIC serving as internal gateway
auto eth1
iface eth1 inet static
address 192.168.50.1
netmask 255.255.255.0
network 192.168.50.0
broadcast 192.168.50.255
gateway 192.168.50.1sudo /etc/init.d/networking restartNext we need to install the DHCP server package on our Pi so we can allocate addresses to clients.
sudo apt-get install isc-dhcp-serverNow let's edit the DHCP server configuration file.
sudo nano /etc/dhcp/dhcpd.confThe configuration files provides a lot of examples that are all commented out. Feel free to read them if you care to. Since this should be the only DHCP server on our network, let's make it authoritative. Uncomment out the authoratative line near the top of the file.
# If this DHCP server is the official DHCP server for the local
# network, the authoritative directive should be uncommented.
authoritative;
Next, lets add a new subnet. Scroll down to the bottom of the file and add something like this:
subnet 192.168.50.0 netmask 255.255.255.0 {
range 192.168.50.10 192.168.50.250;
option broadcast-address 192.168.50.255;
option routers 192.168.50.1;
default-lease-time 600;
max-lease-time 7200;
option domain-name "local";
option domain-name-servers 8.8.8.8, 8.8.4.4;
}
Again, this is assuming a 192.168.50.0/24 subnet. You'll need to change it if you've chosen a different subnet.
You'll also notice I'm using the Google public DNS servers, 8.8.8.8 and 8.8.4.4. If you prefer to use the DNS servers provided by your ISP, you'll need to change this line to reflect their addresses.
Save the file and restart the DHCP service.
sudo /etc/init.d/isc-dhcp-server restart
[ ok ] Stopping ISC DHCP server: dhcpd.
[ ok ] Starting ISC DHCP server: dhcpd.
If you receive an error about no interfaces being in the proper address space double check your configurations and make sure your static address on eth1 is in the same subnet as your DHCP subnet. if you need to make any changes you'll need to restart the relevant services.
At this point you should be able to plug a device into the USB NIC (eth1) interface of your pi and receive an IP address via dhcp. However, you won't be able to get any further on the network than your Pi itself. To solve this, we need to enable IP forwarding.
Guides I read said I needed to do one or the other of the following things, however, I had to do both. First run the following command:
sudo echo 1 > /proc/sys/net/ipv4/ip_forwardNext edit /etc/sysctl.conf and uncomment out the line that says net.ipv4.ip_forward = 1.
sudo nano /etc/sysctl.conf
# Uncomment the next line to enable packet forwarding for IPv4
net.ipv4.ip_forward=1
Save the file.
The final step is to insert an iptables rule to allow NAT.
iptables -t nat -A POSTROUTING -o eth0 -j MASQUERADETime for final testing. Plug a computer into the eth1 interface on your pi and plug the onboard NIC into your modem.
After the negotiation phase, your computer will pull an address and you should be able to access the internet! if it doesn't work, ssh to the Pi by using the address you gave eth1 (192.168.50.1 in my case) and ensure that eth0 has a public address by running ifconfig.
sudo ifconfig -aeth0 Link encap:Ethernet HWaddr b8:27:eb:e8:4a:fe
inet addr:68.229.57.30 Bcast:68.229.51.255 Mask:255.255.255.0
inet6 addr: fe80::ba27:ebff:fee8:4afe/64 Scope:Link
UP BROADCAST RUNNING MULTICAST MTU:1500 Metric:1
RX packets:1851717 errors:0 dropped:0 overruns:0 frame:0
TX packets:680737 errors:0 dropped:0 overruns:0 carrier:0
collisions:0 txqueuelen:1000
RX bytes:1493496473 (1.3 GiB) TX bytes:131062180 (124.9 MiB)
eth1 Link encap:Ethernet HWaddr 40:3c:fc:00:74:b0
inet addr:192.168.50.1 Bcast:192.168.50.255 Mask:255.255.255.0
inet6 addr: fe80::423c:fcff:fe00:74b0/64 Scope:Link
UP BROADCAST RUNNING MULTICAST MTU:1500 Metric:1
RX packets:675292 errors:0 dropped:0 overruns:0 frame:0
TX packets:1052136 errors:0 dropped:0 overruns:0 carrier:0
collisions:0 txqueuelen:1000
RX bytes:116080201 (110.7 MiB) TX bytes:1474222354 (1.3 GiB)
lo Link encap:Local Loopback
inet addr:127.0.0.1 Mask:255.0.0.0
inet6 addr: ::1/128 Scope:Host
UP LOOPBACK RUNNING MTU:16436 Metric:1
RX packets:2 errors:0 dropped:0 overruns:0 frame:0
TX packets:2 errors:0 dropped:0 overruns:0 carrier:0
collisions:0 txqueuelen:0
RX bytes:152 (152.0 B) TX bytes:152 (152.0 B)
sudo ifdown eth0 && sudo ifup eth0Check your IP address by running ifconfig again and see if you can reach the internet. You may need to reboot your modem, however do not reboot your Pi for the reasons that are to follow.
If it's still not working, stop here and go back and make sure you've not missed any steps.
You should not reboot your Pi at this point because the iptables rules for nat we inserted earlier are not persistent and if you reboot they will be overridden by the default configuration (nothing). We can fix this by saving the rules and creating a little script to restore them as the network interfaces come up during boot.
First, save your iptables rules to a file.
sudo iptables-save > /etc/iptables.up.rulesYou don't have to save them to /etc/iptables.up.rules, that's just where I save mine.
Next create a script in /etc/network/if-pre-up.d/ with the following contents:
sudo nano /etc/network/if-pre-up.d/iptables#!/bin/sh
#This script restores iptables upon reboot
iptables-restore < /etc/iptables.up.rules
exit 0
Change ownership and permissions of the script so it will run at boot.
sudo chown root:root /etc/network/if-pre-up.d/iptables && sudo chmod +x /etc/network/if-pre-up.d/iptables && sudo chmod 755 /etc/network/if-pre-up.d/iptablesVoila. You can now reboot and your iptables rules will stay persistent.
For some additional security, lets add some more iptables rules:
sudo iptables -A INPUT -s 192.168.0.0/24 -i eth0 -j DROP
sudo iptables -A INPUT -s 10.0.0.0/8 -i eth0 -j DROP
sudo iptables -A INPUT -s 172.16.0.0/12 -i eth0 -j DROP
sudo iptables -A INPUT -s 224.0.0.0/4 -i eth0 -j DROP
sudo iptables -A INPUT -s 240.0.0.0/5 -i eth0 -j DROP
sudo iptables -A INPUT -s 127.0.0.0/8 -i eth0 -j DROP
sudo iptables -A INPUT -i eth0 -p tcp -m tcp --dport 22 -j DROP
sudo iptables -A INPUT -i eth0 -p icmp -m icmp --icmp-type 8 -j DROP
This blocks access from RFC 1918 subnets on your internet (eth0) interface as well as ICMP (ping) packets and ssh connections.
Remember to save whenever you make changes!
sudo iptables-save > /etc/iptables.up.rulesIf you want to see how many packets your firewall is blocking, run this command:
iptables -L -n -vChain INPUT (policy ACCEPT 215 packets, 23539 bytes)
pkts bytes target prot opt in out source destination
0 0 DROP all -- eth0 * 192.168.0.0/24 0.0.0.0/0
126 34570 DROP all -- eth0 * 10.0.0.0/8 0.0.0.0/0
0 0 DROP all -- eth0 * 172.16.0.0/12 0.0.0.0/0
0 0 DROP all -- eth0 * 224.0.0.0/4 0.0.0.0/0
0 0 DROP all -- eth0 * 240.0.0.0/5 0.0.0.0/0
0 0 DROP all -- eth0 * 127.0.0.0/8 0.0.0.0/0
0 0 DROP tcp -- eth0 * 0.0.0.0/0 0.0.0.0/0 tcp dpt:22
0 0 DROP icmp -- eth0 * 0.0.0.0/0 0.0.0.0/0 icmptype 8
0 0 DROP all -- eth0 * 192.168.0.0/24 0.0.0.0/0
Chain FORWARD (policy ACCEPT 15696 packets, 14M bytes)
pkts bytes target prot opt in out source destination
Chain OUTPUT (policy ACCEPT 191 packets, 25875 bytes)
pkts bytes target prot opt in out source destination At this point, you should have a fully functional router that has extremely low power usage and some basic security.
In the future, I plan to add a switch to my network and add some 802.1q trunks to my USB Nic so I can have multiple LANs, but that's a different article.


